And so, the virtualization server that we installed here can be used to run guest operating systems for this we need a KVM. We must first determine whether the processor is our hardware virtualization, go to the console and run the command:
egrep '(vmx|svm)' /proc/cpuinfo
If there is a conclusion, it means that your processor supports hardware virtualization, there is the need to put another package servak.Probuem KVM.
yum install kvm libvirt python-virtinst qemu-kvm bridge-utils
Start the daemon libvirtd and add it to autostart
service libvirtd start
chkconfig libvirtd on
And check out how to install
virsh -c qemu:///system list
No errors, then all horosho.Otklyuchim Service Network Manager, and switch to the network manager by default.
service NetworkManager stop
service network start
chkconfig NetworkManager off
chkconfig network on
Now, what would be the guest machine (virtualke) had full access to the network, it is necessary to set up a bridge (bridge) .Ego we do with our active eth0 interface for this add another br0 make a copy of the eth0 interface
cp /etc/sysconfig/network-scripts/ifcfg-eth0 /etc/sysconfig/network-scripts/back.ifcfg-eth0
Open the file for editing and interface eth0 and put the following text
nano /etc/sysconfig/network-scripts/ifcfg-eth0
DEVICE=eth0
TYPE=Ethernet
ONBOOT=yes
NM_CONTROLLED=yes
BRIDGE=br0
Ctrl +O и Ctrl+X
Copy the file to a new backup interface br0.
cp /etc/sysconfig/network-scripts/back.ifcfg-eth0 /etc/sysconfig/network-scripts/ifcfg-br0
Откроем и приведем его к виду
nano /etc/sysconfig/network-scripts/ifcfg-br0
DEVICE=br0
TYPE=Bridge
ONBOOT=yes
NM_CONTROLLED=yes
BOOTPROTO=none
IPADDR=192.168.0.11
GATEWAY=192.168.0.1 # an IP router, firewall, then after someone off the Internet
DNS1=8.8.8.8 # DSN is google
DOMAIN= #The workgroup name (or domain)
DEFROUTE=yes
IPV6INIT=no
NAME="System br0"
Ctrl +O и Ctrl+X
Significant comments in the text, now it is necessary to restart the grid (if you make a mistake, the console may fall off)
service network restart
ifconfig --show us all of our active interfaces (eth0, br0, lo, virt ....)
You can now create virtualke, but since there is a possibility to do it in the GUI you must first install the GUI to work with Dev execute command
yum install virt-manager libvirt qemu-system-x86 openssh-askpass libcanberra-devel
You can also add
yum install qemu-guest-agent qemu-kvm-tools
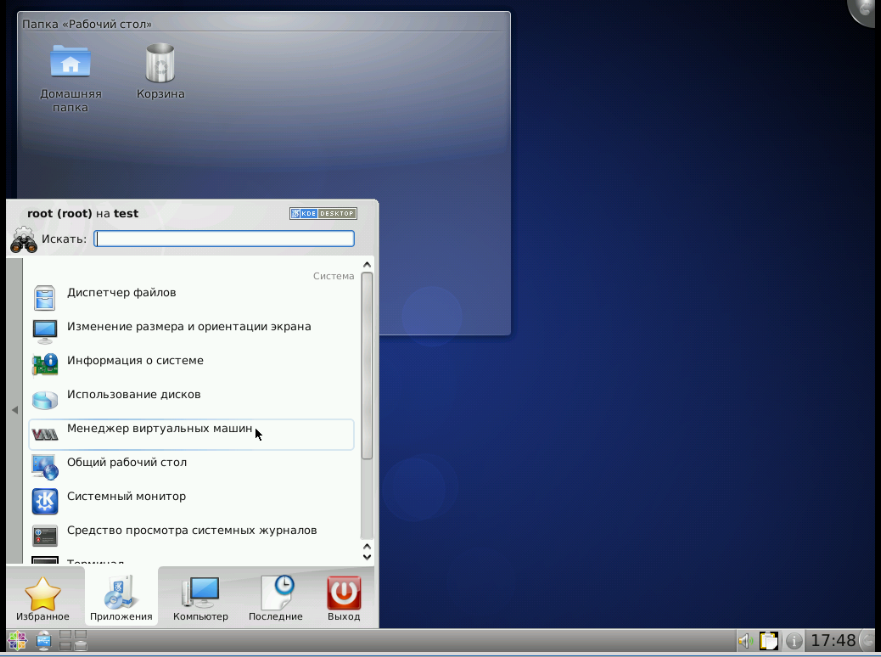
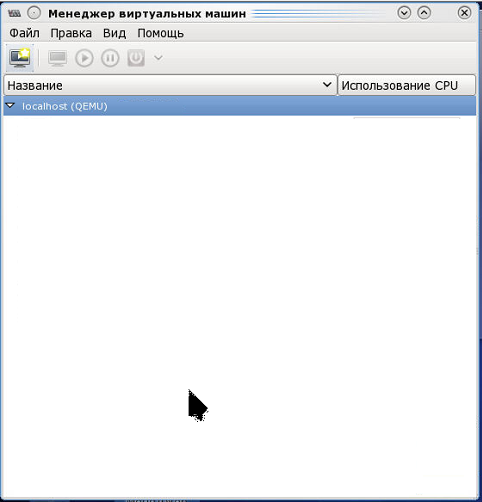
The KDE (graphical interface) appear as "Virtual Machine Manager" to them and then we will put virtualke
Before you start creating virtual ok small course tool allows you to work with (* .img) files virtual ok, yes, I create them in files, but do not mark up the space on the disk, the file is convenient, you can copy the move well, etc. Teams increase and decrease the size of the file that respectively virtualke you will create an additional drive, or increase an existing one. We finish the virtual machines associated with variable disk images.
Increase the size of the image. In the case of KVM / QEMU:
qemu-img resize vm.img +5GB
This will add the 5 GB. to the size of the virtual disk.
With decreasing a little more complicated. you first need to virtualke free up disk space, reduce the drive means virtualke and then run the above command, replace only a plus to minus, or no sign, experiment, I do not remember.
There are still a team qemu-img convert which can convert to different formats (img, qcow2 .....).
Continue going to the GUI and run the "Virtual Machine Manager", will put Windows 10, microsoft announced that it can be installed for free, we go here and swing you want us to image (I recommend to start with (32-bit (x86) version)) I He puts it.
By pressing the monitor
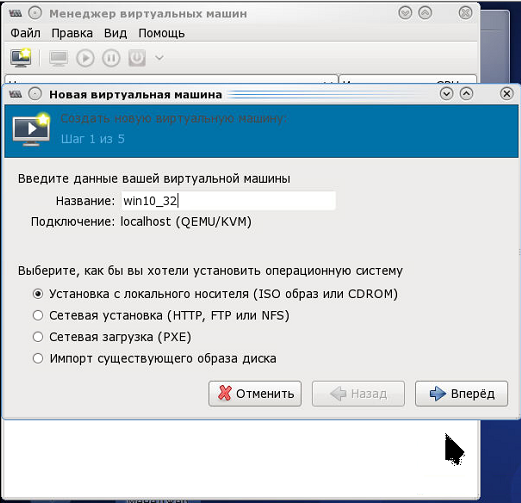
Fill as in the picture, can be called whatever you want :) Next
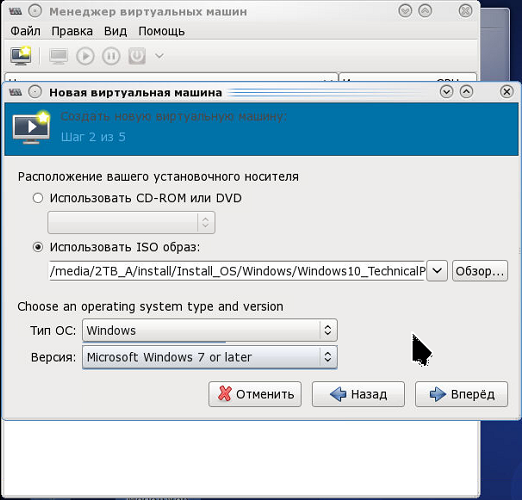
Select the image that downloaded, OS type, version
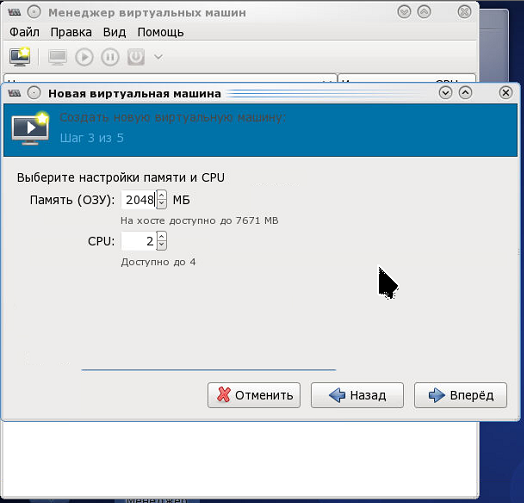
The processor (with the proviso that the cores have sufficient), 2 GB memory. enough Forward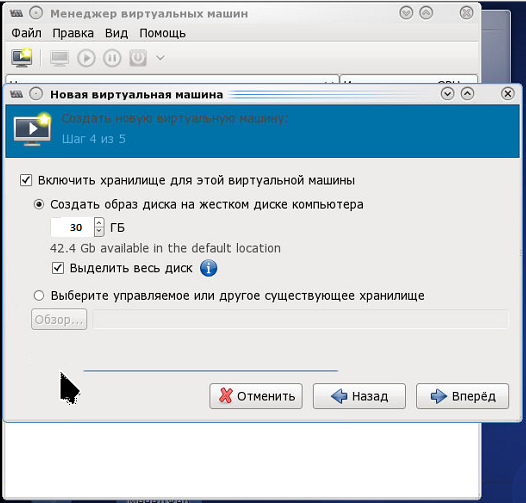
That is the size of the disk, I 30 GB. chose (not set yet 10), Forward
In the Advanced Settings box, our bridge br0 (it will hang our Windows network card) and the architecture of the OS
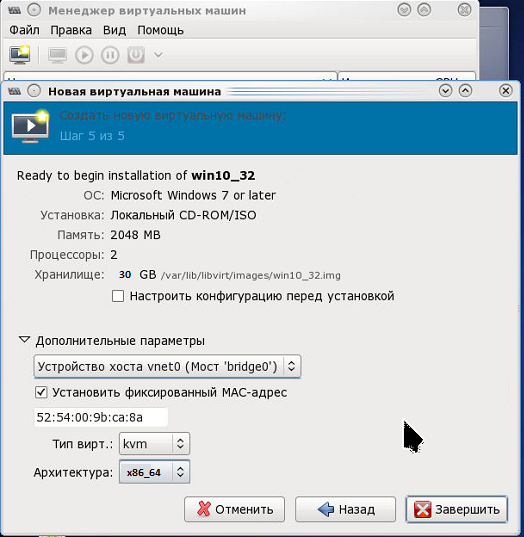
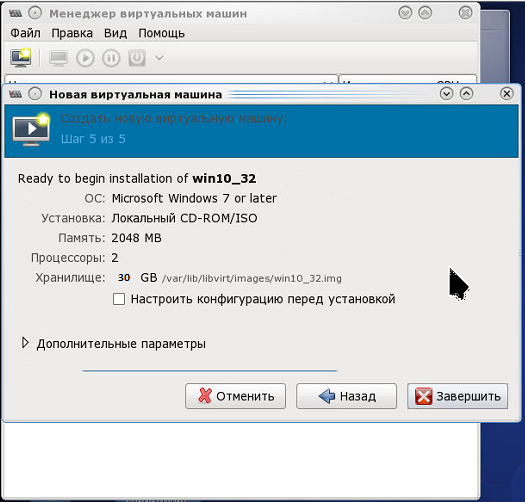
Finally Complete, KVM posherstiv bit and start installation
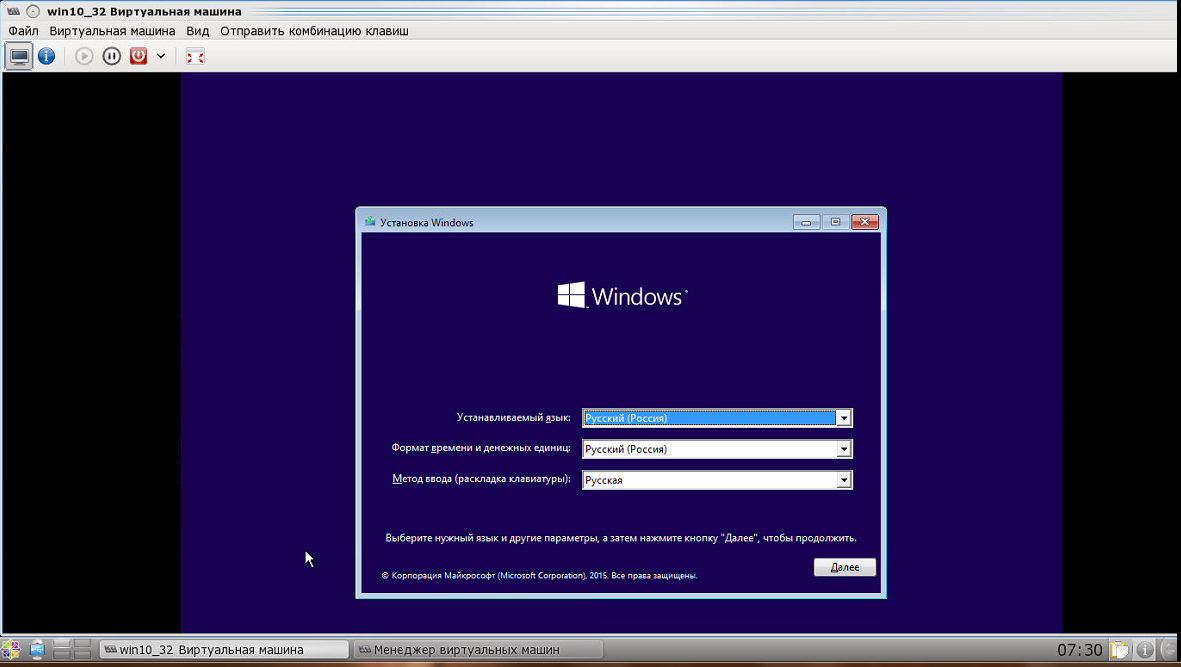
After witchcraft installing windows, we finally behold this miracle, ha.
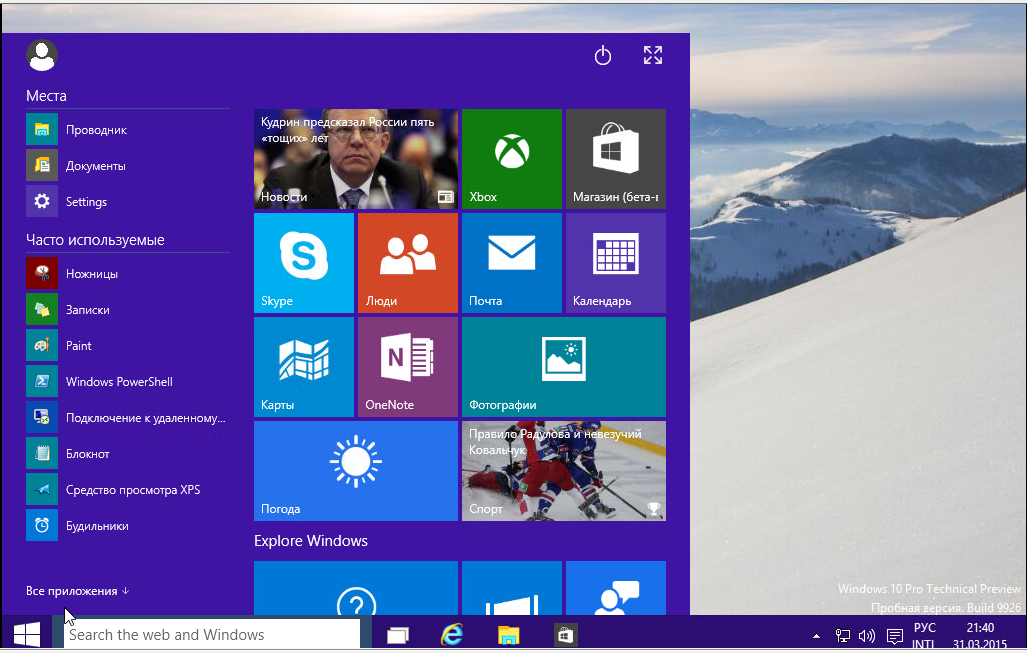
Like this.